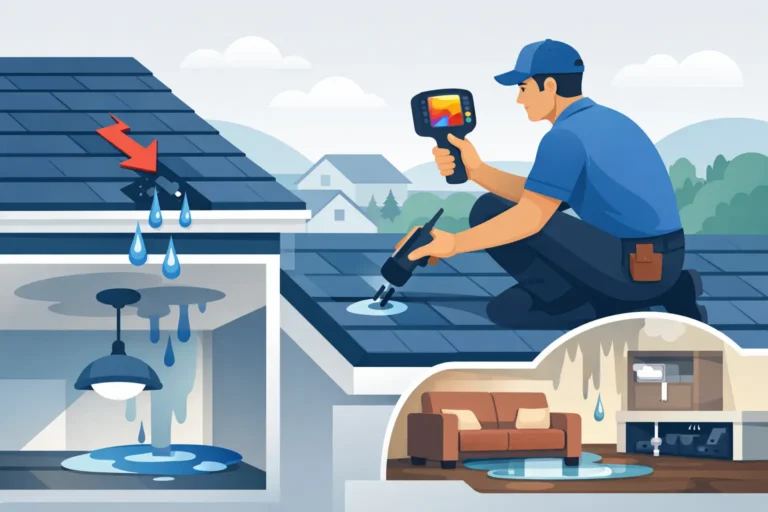


A roof problem rarely starts as an emergency. It may begin with one lifted shingle after a windstorm, a small stain on a ceiling, or water that backs up at a clogged gutter. This Durand roof inspection checklist helps homeowners and property managers notice warning signs early, understand what they mean, and know when it is time to call a local roofing contractor.
A careful inspection does not mean climbing onto the roof. In fact, walking on aging shingles or low-slope roofing can cause damage and create a serious fall risk. Most property owners can learn a great deal from the ground, inside the building, and around the roof perimeter. A professional inspection fills in the details that are not safe or practical to see yourself.
Start With a Safe Ground-Level Review
Walk around the property on a clear day and look at each roof plane from the ground. Step back far enough to see the full slope and pay attention to areas where the roofline looks uneven. A dip, sag, or wavy section may point to deteriorated decking, framing concerns, long-term moisture exposure, or several layers of old roofing materials.
Look for shingles that are missing, cracked, curled, buckled, or visibly out of place. Wind can loosen shingles without removing them completely, so an apparently minor lifted edge deserves attention. Granules collecting at the end of downspouts or in gutters are another common sign of asphalt shingle wear. Some granule loss is normal as a roof ages, but heavy accumulation can mean the shingles are nearing the end of their useful life.
Also inspect visible roof penetrations and edges. Chimneys, plumbing vents, skylights, wall intersections, valleys, and the roof-to-gutter transition are common leak locations because they depend on properly installed flashing and sealants. Rusted flashing, cracked sealant, exposed fasteners, or gaps around a penetration can allow water beneath the roofing surface.
Check Gutters, Downspouts, and Water Flow
A roof is only part of the drainage system. Gutters and downspouts need to move water away from the home or building without allowing it to back up under the lower edge of the roof.
From a ladder only if it can be done safely, or from the ground with binoculars, look for gutters pulling away from the fascia, standing water, overflowing sections, and debris buildup. Leaves, twigs, and shingle granules can block drainage and keep the roof edge wet longer than it should be. In winter, poor drainage can contribute to ice dams, which can force melting water under shingles and into the structure.
Make sure downspouts discharge away from the foundation. If one area overflows every time it rains, the issue may be a clogged downspout, incorrect gutter pitch, or a roof valley concentrating more water than the gutter system can handle. Solving that drainage issue can prevent rot at the eaves and recurring interior leaks.
Inspect the Attic and Interior for Moisture Clues
The attic often tells the true story of a roof’s condition. Bring a flashlight and inspect the underside of the roof deck during daylight hours. Look for dark staining, damp insulation, mold-like growth, wet wood, or daylight showing through the roof deck. A musty odor can also point to moisture, even if there is no visible drip at the time of your inspection.
Pay close attention to the areas around vents, chimneys, valleys, and roof transitions. Water can travel along framing before it appears on a ceiling, so the stain inside the home may not sit directly below the leak source.
Inside finished rooms, check ceilings, exterior walls, and upper corners for yellow or brown stains, bubbling paint, peeling drywall tape, or soft spots. These signs do not always mean the roof is leaking. Condensation from poor attic ventilation, plumbing leaks, and chimney issues can create similar symptoms. That is why leak detection should focus on finding the source rather than simply covering the visible stain.
Look for Storm Damage After High Wind or Hail
Michigan weather can put a sound roof through a lot in one season. Inspect after major wind, hail, heavy rain, or ice events, especially if you hear debris strike the roof or find shingles in the yard.
Wind damage may show up as creased shingles, lifted tabs, missing ridge cap pieces, or loosened flashing. Hail damage is harder to identify from the ground. It can leave impact marks that remove granules and shorten the life of shingles, but it may not create an immediate leak. A professional inspection can document the condition of the roofing system and help a property owner understand whether an insurance claim may be appropriate.
Take clear photos of visible damage, fallen branches, interior staining, and affected gutters or siding before temporary repairs are made. Keep receipts for emergency protection work. A tarp may limit additional water damage, but it should not be treated as a permanent repair.
Durand Roof Inspection Checklist for Low-Slope Buildings
Commercial roofs and low-slope residential additions need a different inspection approach. TPO and EPDM membrane roofs rely on properly sealed seams, flashings, penetrations, drains, and edge details. The roof can look mostly flat from the ground while holding water in low areas that put stress on the membrane.
Property managers should look for ponding water that remains more than 48 hours after rainfall, open seams, membrane tears, damaged edge metal, loose flashing, and blocked drains or scuppers. HVAC service traffic is another concern. Tools, dropped parts, and repeated foot traffic can puncture a membrane or damage protective surface layers.
A low-slope roof does not always need a full tear-off when it begins to show wear. If the existing system is dry, structurally sound, and suitable for restoration, a coating or recoating system may extend service life at a lower cost than replacement. That decision depends on moisture conditions, membrane condition, drainage, and the roof’s repair history. A proper inspection should identify whether restoration is a realistic option or whether replacement is the safer long-term investment.
Review Ventilation and Roof-Edge Details
Good attic ventilation helps control heat and moisture. Inadequate intake ventilation at the eaves or restricted exhaust ventilation near the ridge can contribute to overheated shingles, condensation, and moisture buildup in the attic. Ventilation problems are not always visible from the ground, but warning signs include excessive attic heat, frost on the underside of the roof deck during cold weather, and recurring moisture stains without an obvious exterior opening.
The roof edge also deserves a close look. Fascia boards, soffits, drip edge, and gutter attachments are exposed to repeated water movement. Soft, stained, or peeling wood at the eaves can indicate that water has been getting behind the gutter or under the roof edge for some time. Addressing this early is usually simpler than waiting until decking and framing repairs are needed.
Know When a Professional Inspection Makes Sense
A visual check is useful for spotting obvious concerns, but it cannot confirm the remaining life of a roof or identify every hidden defect. Schedule a professional inspection when you see active leaking, missing materials, storm impacts, repeated ice damming, interior moisture, sagging, or a sudden increase in roofing debris around the property.
It also makes sense to schedule an inspection when a roof is approaching the later part of its expected service life, before listing a property for sale, after buying a building, or before making a large repair decision. For commercial owners, regular inspections can help prioritize repairs before a small seam opening becomes a disruptive interior leak.
A trustworthy inspection should lead to a clear explanation of what was found, what needs immediate attention, what can be monitored, and what the repair or replacement options involve. DLR Construction provides free estimates with line-item scope details, protection measures, cleanup, disposal, and warranty information so property owners can make a decision without surprises.
The most useful roof inspection is the one performed before water reaches the ceiling. If something in this checklist raises a question, take a photo, note the location, and have it evaluated while the repair is still manageable.